Image controls can be used to display images such like png, jpg or gif.
Just pass the file path and you're done.
Without the width and height dimensions the image will be shown without any scaling.
Example - Original Size
{
lay = app.CreateLayout( "Linear", "VCenter,FillXY" );
img = app.CreateImage( "/Sys/Img/Droid1.png" );
img.SetOnTouch( img_OnTouch );
lay.AddChild( img );
app.AddLayout( lay );
}
function img_OnTouch( ev )
{
if( ev.action=="Down" )
app.ShowPopup( "Ouch!" );
}
def OnStart():
lay = app.CreateLayout( "Linear", "VCenter,FillXY" )
img = app.CreateImage( "/Sys/Img/Droid1.png" )
img.SetOnTouch( img_OnTouch )
lay.AddChild( img )
app.AddLayout( lay )
def img_OnTouch( ev ):
if ev.action=="Down":
app.ShowPopup( "Ouch!" )
If you specify one of them and leave the other null, -1 or blank, it will be scaled so that the aspect ratio is kept.
Example - Maintain Aspect
{
lay = app.CreateLayout( "Linear", "VCenter,FillXY" );
img = app.CreateImage( "/Sys/Img/Droid1.png", 0.5, -1 );
img.SetOnTouch( img_OnTouch );
lay.AddChild( img );
app.AddLayout( lay );
}
function img_OnTouch( ev )
{
if( ev.action=="Down" )
app.ShowPopup( ev.x[0] + ", " + ev.y[0], "Short" );
}
def OnStart():
lay = app.CreateLayout( "Linear", "VCenter,FillXY" )
img = app.CreateImage( "/Sys/Img/Droid1.png", 0.5, -1 )
img.SetOnTouch( img_OnTouch )
lay.AddChild( img )
app.AddLayout( lay )
def img_OnTouch( ev ):
if ev.action=="Down":
app.ShowPopup( ev.x[0] + ", " + ev.y[0], "Short" )
And if you specify both parameters it will be scaled to your wishes.
Example - Stretched
{
lay = app.CreateLayout( "Linear", "VCenter,FillXY" );
img = app.CreateImage( "/Sys/Img/Droid1.png", 0.5, 0.7 );
img.SetOnTouch( img_OnTouch );
lay.AddChild( img );
app.AddLayout( lay );
}
function img_OnTouch( ev )
{
if( ev.action=="Down" )
app.ShowPopup( "Aaaargh!" );
}
def OnStart():
lay = app.CreateLayout( "Linear", "VCenter,FillXY" )
img = app.CreateImage( "/Sys/Img/Droid1.png", 0.5, 0.7 )
img.SetOnTouch( img_OnTouch )
lay.AddChild( img )
app.AddLayout( lay )
def img_OnTouch( ev ):
if ev.action=="Down":
app.ShowPopup( "Aaaargh!" )
If you want images to depress like buttons if touched you can use the
Example - Button
{
lay = app.CreateLayout( "linear", "VCenter,FillXY" );
btn = app.CreateImage( "/Sys/Img/Hello.png", 0.2, -1, "button" );
btn.SetOnTouchUp( btn_OnTouch );
lay.AddChild( btn );
app.AddLayout( lay );
}
function btn_OnTouch()
{
app.ShowPopup( "Hello World!" );
app.Vibrate( "0,100,30,100,50,300" );
}
def OnStart():
lay = app.CreateLayout( "linear", "VCenter,FillXY" )
btn = app.CreateImage( "/Sys/Img/Hello.png", 0.2, -1, "button" )
btn.SetOnTouchUp( btn_OnTouch )
lay.AddChild( btn )
app.AddLayout( lay )
def btn_OnTouch(event):
app.ShowPopup( "Hello World!" )
app.Vibrate( "0,100,30,100,50,300" )
Drawing on Images
Images are also useful for drawing basic shapes and other images on it and therefore for creating dynamic animations or even basic games. To create an empty image you can pass null as file parameter.
This way you can also specify a fixed pixel size to the image you can use the
img.DrawLine( 0, 0, 1, 1 );
If you dislike the anti-alias effect you can apply the
img2.DrawImage( img, 0, 0, 1, 1, 0 );
There are a whole bunch of drawing methods defined here. Some of the were already used above. You can draw lines, rectangles, circles and other images, just to name a few. You can even draw a transformed image using an transformation matrix. Check out the Draw* methods in the method list below to get more details about all drawing functions.
Example - Draw Shapes
{
lay = app.CreateLayout( "Linear", "VCenter,FillXY" );
img = app.CreateImage( null, 0.8, 0.8 );
lay.AddChild( img );
img.SetColor( "#8888ff" );
img.SetPaintColor( "#ff0000" );
img.DrawCircle( 0.5, 0.5, 0.1 );
img.DrawRectangle( 0.7, 0.7, 0.1, 0.75 );
app.AddLayout( lay );
}
def OnStart():
lay = app.CreateLayout( "Linear", "VCenter,FillXY" )
img = app.CreateImage( None, 0.8, 0.8 )
lay.AddChild( img )
img.SetColor( "#8888ff" )
img.SetPaintColor( "#ff0000" )
img.DrawCircle( 0.5, 0.5, 0.1 )
img.DrawRectangle( 0.7, 0.7, 0.1, 0.75 )
app.AddLayout( lay )
Drawing on Images fast
If you have many draw operations to perform at runtime (ie. for games) you might want to disable the automatic canvas update after each Draw* call using the SetAutoUpdate method. To force the rendering now, you have to call Update.
Another way to increase the animation speed is using the NoDom configuration. This will disable html and js Dom elements in your app that consume a lot of resources, but app functions can still be used.
For animations you can then use the Animate function of the app object which calls a function for a given amount per second. Note that the canvas still needs some time to refresh - so going over 60 fps makes no sense at all.
Example - Advanced Clock Animating
var wh;
function OnStart()
{
lay = app.CreateLayout( "linear", "VCenter,FillXY" );
// clock pointer
ptr = app.CreateImage( null, 0.1, 0.1, "fix,alias", 30, 30 );
ptr.SetTextSize( 4.3 );
// image aspect ratio for drawing square images
wh = ptr.GetAbsWidth() / ptr.GetAbsHeight();
// main canvas
img = app.CreateImage( null, 1, 1, "alias" );
img.SetPaintStyle( "line" );
img.SetAutoUpdate( false );
img.SetLineWidth( 15 );
lay.AddChild( img );
app.AddLayout( lay );
app.SetDebug( "console" );
app.Animate( OnAnimate, 40 );
}
function OnAnimate( time, dtime )
{
time = Date.now();
// calculate pointer position from current time
var secs = time / 1000;
var angle = Math.PI * secs / 2 + Math.abs( Math.sin( Math.PI * secs ));
var px = 0.5 + 0.5 * Math.cos( angle );
var py = 0.5 + 0.5 * Math.sin( angle );
// get current datetime
var hrs = Math.floor( secs / 3600 ) % 60;
var min = Math.floor( secs / 60 ) % 60;
var sec = Math.floor( secs ) % 60;
var time = min + ":" + sec;
// measure text dimensions for centering
var tsize = ptr.MeasureText( time );
var tx = (1 - tsize.width ) / 2;
var ty = (1 + tsize.height) / 2;
// draw pointer and datetime text
ptr.Clear();
ptr.SetPaintColor( "red" );
ptr.DrawLine( .5, .5, px, py );
ptr.SetPaintColor( "white" );
ptr.DrawText( time, tx, ty );
// render
img.Clear();
img.DrawCircle( .5, .5, .48 );
img.DrawImage( ptr, 0, (1 - wh) / 2, 1, wh );
img.Update();
}
from native import app
import math
import time as Date
def OnStart():
global ptr, wh, img
lay = app.CreateLayout( "linear", "VCenter,FillXY" )
ptr = app.CreateImage( None, 0.1, 0.1, "fix,alias", 30, 30 )
ptr.SetTextSize( 4.3 )
wh = ptr.GetAbsWidth() / ptr.GetAbsHeight()
img = app.CreateImage( None, 1, 1, "alias" )
img.SetPaintStyle( "line" )
img.SetAutoUpdate( False )
img.SetLineWidth( 15 )
lay.AddChild( img )
app.AddLayout( lay )
app.SetDebug( "console" )
app.Animate( OnAnimate, 40 )
def OnAnimate( time, dtime ):
time = Date.now()
secs = time / 1000
angle = math.pi * secs / 2 + abs( math.sin( math.pi * secs ))
px = 0.5 + 0.5 * math.cos( angle )
py = 0.5 + 0.5 * math.sin( angle )
hrs = math.floor( secs / 3600 ) % 60
min = math.floor( secs / 60 ) % 60
sec = math.floor( secs ) % 60
time = min + ":" + sec
tsize = ptr.MeasureText( time )
tx = (1 - tsize.width ) / 2
ty = (1 + tsize.height) / 2
ptr.Clear()
ptr.SetPaintColor( "red" )
ptr.DrawLine( .5, .5, px, py )
ptr.SetPaintColor( "white" )
ptr.DrawText( time, tx, ty )
img.Clear()
img.DrawCircle( .5, .5, .48 )
img.DrawImage( ptr, 0, (1 - wh) / 2, 1, wh )
img.Update()
Properties
The following properties are available on the Image object:
Methods
The following methods are available on the Image object:
hexadecimal:
colourName:
 ”
”app object: Image
Adjust the visual color effect of the control by setting the Hue (by angle in degrees in a color circle), the saturation, brightness and contrast of the control.
Animates the control.
There are
Batch method calls to be able to set all object's properties at once.
Note that you need to specify each parameter (use
Inherited methods can be called by appending an underscore to the function name (ie. txt.Batch({ SetBackColor_: [
Clears everything on the image except the background.
Removes the focus of the control so that the user no longer has immediate access to it.
An object for saving individual extra properties.
Draws an elliptical arc by specifying the corners of the surrounding rectangle and the angle range of the arc to be drawn.
Draws a Circle.
Draws the frame on a given time of a loaded gif file.
Draws an image with a 2d transformation matrix.
Draws a line.
Draws a single pixel.
Draws a rectangle.
Draws a vertically centered graph in relation to the specified range in both direction.
The sample value 0 would be vertically centered, -range at the top and range at the bottom.
The sample x positions are evenly distributed over the whole image width.
Draws a text.
Applies certain modifications to the image data, such as translate, scale, skew or alpha.
Set the focus to the control so that the user can interact with it immediately.
Get the absolute height of the control in pixels.
Note that unlike the objects margins its padding does change this value.
Get the absolute width of the control in pixels.
Note that unlike the objects margins its padding does change this value.
Get the height of the control as screen height relative float or in pixels with the px option.
Note that unlike the objects margins its padding does change this value.
Get the distance from the control to the left parent border as width relative float or in pixels with the px option.
Returns the name set via SetName.
Returns the parent control object where the object was added to - commonly a layout.
Returns the [r,g,b] values from a pixel on the image.
Returns the raw, png or jpg image data encoded as base64.
Returns data about the position and size of the control.
If the screen option is given the position on the screen will be returned. Otherwise relative to the parent control.
The px options turns the relative values into pixels.
Get the distance from the control to the upper parent border as height relative float or in pixels with the px option.
Returns the control class name.
Returns the current visibility state of the control. The Values are:
Show: visible
Hide: invisible but still consuming space
Gone: invisible and not consuming space
Get the width of the control as screen width relative float or in pixels with the px option.
Note that unlike the objects margins its padding does change this value.
Hides the control without consuming any more layout space as if it were never there.
Hide the control but keep the layout space free.
Returns whether the control is currently useable by the user.
Returns whether the control overlaps with another by a given distance.
Returns whether the control is currently visible to the user, ignoring overlaying controls.
Measure width and height of a given text with the current image settings.
Allows access to other functions defined on the object in Java via reflection.
Moves the content of the image to the specified position.
Resets all transformations.
Resize a control after device rotation by keeping the original width/height ratios.
Rotates the content.
Saves the image to a file on the local filesystem.
Scales the content by the given factors.
Change the image alpha to a value between 0 and 255, where 0 is full transparent.
En/disable updating the view after every drawing or transformation method.
Set the transparency of the background by an alpha value between 0 (no transparency) and 0.99 (full transparent) or 1 (no transparency) and 256 (full transparent)
Changes the background color of the control.
Define the background color of the control with a gradient. The default gradient direction is from top to bottom, but you can change it from left to right and the reversed versions of course.
Define a radial color gradient for the background of control.
Changes the background to an image which can be repeated using the repeat option.
An image which is often used with that option is '/res/drawable/pattern_carbon' - try it out!
Fills the image with a specific color.
Adjust the visual color effect with a color and a given BlendMode. More information about BlendMode can be found in the Android Developer page.
Set a control description for accessibility
En/Disable the control physically and visually so that the user can/can not access the control. Events like OnTouch will still be fired.
Change the font style by defining a font file.
Set the content to an image control or specify a path to an image which will then be loaded.
Set the stroke width to a number in pixels.
Define a distance to other controls on each side of the control.
Set a minimum timeout between two touch 'move' actions fired.
Change the name of the image.
Define a callback function which is called when the image has loaded in
Define a callback function which is called when the object has been long pressed.
Define a callback function that is called when the user touches the control. In addition, an event object is passed to the callback function to obtain information about the touch type, the touch position(s), the amount of touches and the control that was touched.
Define a callback function which is called when the user started toching the control.
Define a callback function which is called when the user drags a finger over the screen.
Define a callback function which is called when the users finger leaves the screen.
Define distances that elements within the control are to maintain from the control borders.
Change the current paint color for drawing methods.
Change the current paint style for drawing methods.
Set the image to base64 encoded pixel data.
En-/Disable pixel mode for the image so that all drawing methods use either control relative or pixel values.
Defines the position and size for the control if the parent is an absolute layout.
Scales the control along with its contents by the factors passed to the function.
Change the size of the control in either screen relative values or in pixels if the px option was given.
Change the size of drawn text.
En/Disables touch events to be fired on the control. Other events like OnChange will still be fired.
Change the visibility of the control to one of the available modes:
Show: visible
Hide: invisible but still consuming space
Gone: invisible and not consuming space
Set the visibility of the control to
Skews the content.
Transform the content with a 2d transformation matrix.
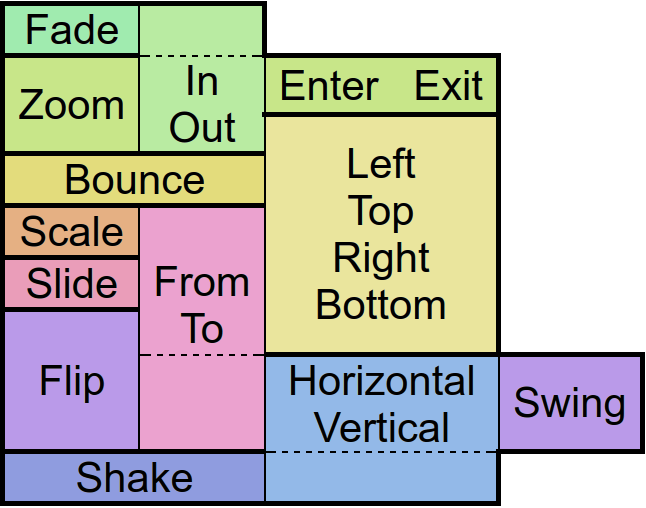
Performs an animation on the control.
The target object is for the position, size and rotation that the control has at the end of the animation.
The type specifies the behavior and the speed of the animation. Separated by a dot, you must also specify whether you want to apply this behavior to the beginning (In), end (Out), or to both (InOut) times of the animation.
With the amount of repeats you can control how many times you want to play the animation.
If you have jojo activated, the animation will alternate between forward and backward playback, so that if the repetition value is odd, the control will be at the start position again at the end of the animation.
Finally the callback function will be called after the animation has finished. Well, it's about time!
Update the view in disabled AutoUpdate mode.